Hello there, Today, we’ll go into the wicked world of Warhammer 3 and discuss one great Chaos unit: the Tower of Zharr. This gigantic structure is your ticket to Chaos dominance if you want to add some major oomph to your games.

What is Tower of Zharr in Warhammer 3?
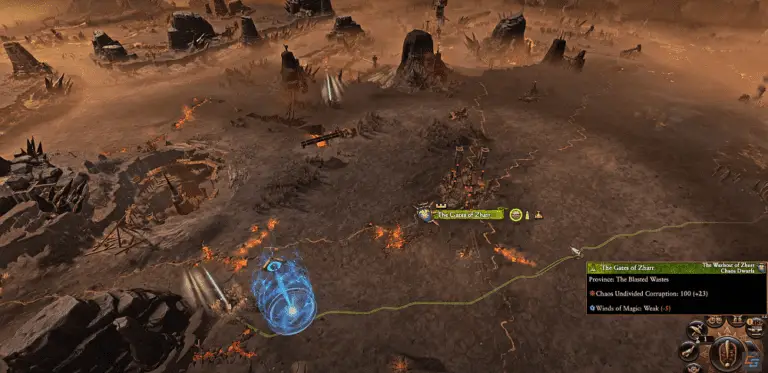
Okay, first things first, let’s get to know this beast. The Tower of Zharr is a massive, demonic castle presented to you by Chaos Dwarf soldiers. Don’t be fooled by its brick-and-mortar appearance; this devilish tower packs a punch. In the Warhammer Fantasy Battles setting, the Tower of Zharr is a strong edifice linked with the Chaos Dwarfs faction. Chaos Dwarfs are a warped and evil offshoot of ordinary Dwarfs who have succumbed to Chaos worship and enjoy terrible sorcery and engineering.
The tower is a terrifying weapon capable of shooting and destroying foes on the battlefield. It’s where the Chaos Dwarfs’ commanders and magic users assemble, and it helps them govern the Warhammer world. When playing Warhammer, you can use the Tower of Zharr as a powerful unit to defeat your opponents and become a force reckoned with.
District Benefits for Each tier
The Tower of Zharr, an evil symbol of Chaos dominance, holds devastating powers in Warhammer 3. Controlled by sinister Chaos Dwarfs, it offers district benefits across three tiers.
Tier 1:

Sorcery Gain a formidable 10% research rate increase, unlocking potent spells to thwart your foes.
Military Mobilize with unparalleled might, breaching enemy walls instantly during sieges.
Industrial Enjoy a 5% increase in Raw Materials and Armaments output, arming your armies.
Tier 2:

Sorcery Spread Corruption with +2 Chaos Undivided Corruption in nearby provinces.
Military Swiftly mobilize with +2 Global Recruitment capacity, assembling formidable armies.
Industrial Ensure smooth supply flow with +1 extra Maximum active Convoys on the battlefield.
Tier 3:

Sorcery Reduces Winds of Magic cost by 10%, unleashing devastating magic.
Military Rapidly recruit with -1 turn global recruitment duration.
Industrial Extend your empire’s grasp with +3 Control in all provinces.
Wield the Tower’s power responsibly, forging a legacy of Chaos dominance in Warhammer 3.
Seat Benefits for Tower of Zharr
| Seat | District | Cost | Effects |
|---|---|---|---|
| Prophet | Sorcery | 75 | +6% casualty replenishment |
| Black Alchemist | Sorcery | 75 | Random magical item every 3 turns |
| Cardinal Daemonsmith | Sorcery | 75 | -10% armaments cost |
| Thaumaturge | Sorcery | 75 | +2 Winds of Magic per turn |
| Legate of Zharr | Military | 75 | Armour of Contempt ability |
| Warmonger | Military | 75 | +15% campaign movement |
| Black Smith | Military | 75 | +25 Armaments per turn |
| Quartermaster | Military | 75 | Random weapon every 3 turns |
| Machinator | Industrial | 75 | +100 Raw Materials per turn |
| Excise Collector | Industrial | 75 | +25% income from Settlement buildings |
| Preceptor | Industrial | 75 | Random follower every 3 turns |
| Consul | Industrial | 75 | +20 Diplomatic Relations |
| Hierophant | Sorcery | 150 | Blood & Fireborn ability |
| Grand Reaper | Sorcery | 150 | +1 unit capacity for Flying units |
| Daemogogue | Sorcery | 150 | Flame & Shadow ability |
| Conscriptor | Military | 150 | +1 unit capacity for Infantry |
| Ordinator | Military | 150 | Dreadquake Battery ability |
| Lord Warlock | Military | 150 | Wrath of Zharr ability |
| Grand Architect | Industrial | 150 | -1 construction time for buildings |
| Expounder General | Industrial | 150 | +1 Conclave Influence per turn |
| Trafficker | Industrial | 150 | +10% Convoy cargo capacity |
| Mutator | Sorcery | 300 | +3 Winds of Magic capacity |
| Black Artificer | Sorcery | 300 | Doom of Hashut ability |
| Field Marshall | Military | 300 | Spawns temporary Hobgoblin army |
| Infernatus | Military | 300 | -1% upkeep for each military seat |
| Procurator | Industrial | 300 | -2% construction cost for industry |
| High Commissioner | Industrial | 300 | -5% Raw Materials requirements |
| Master of the Conclave | 600 | Confederate Servants of the Conclave | |
| Dominator | 600 | Confederate Disciples of Hashut | |
| Subjugator | 600 | Confederate Legion of Azgorh | |
| Commander | 600 | Confederate Warhost of Zharr |
How to use the Tower of Zharr?
The Tower of Zharr is a massive fortification in Warhammer that the Chaos Dwarfs possess. It works as a terrifying weapon during conflicts, firing and destroying adversaries. To utilise it properly, you must strategically deploy it on the game board, targeting opponent units you want to defeat. Keep the tower safe by surrounding it with strong forces. Keep an eye out for impediments that could obstruct its shoots and, if necessary, transfer it to a better location.

You can also utilise the tower to trick your opponent into assaulting it, then surprise them with other units. Its strikes are well-timed and targeted at crucial enemies. If there are strong defences, the tower can assist in breaking them down before your main assault. Practise numerous methods to become a good Tower of Zharr user and enjoy dominating your Warhammer opponents.

- Recruit the Chaos Dwarfs: First and foremost, you must have the correct guys for the job. If you can get some Chaos Dwarfs, they’ll gladly bring their pet Tower of Zharr to the party.
- Park it Wisely: The objective is to strategically place the tower. Please choose a location on the battlefield where it will wreak the most havoc (pun intended!). Allow your creativity to go wild regarding high terrain, chokepoints, or locations near your frontline.
- Take ‘Em All: Now comes the exciting part! The Tower of Zharr is outfitted with a terrifying arsenal of magical artillery. It possesses flaming projectiles, black magic, and who knows what else! Destruction will fall on your opponents, and they will scatter like scared mice!
- Defend the Tower: The Tower is valuable, so keep it safe! Surround it with your most powerful troops, especially large brutes or strongly armoured infantry. Nobody’s going to meddle with your tower now.
Also see – Prophecy dungeon Loot – Destiny 2
Some tricks for Tower of Zharr
When you confederate another Chaos Dwarf faction, you claim their seats in the tower?
Bait and Blast:
Draw your foes to the tower by acting like it’s not a big deal. When they get close enough, unleash hell on them. Suckers, surprise!
The Tower of Zharr is immense and not going anywhere alone. As a result, design your strategy properly. Be adaptable, and remember that abandoning the tower is okay if it’s too dangerous.
Experiment and Learn:
Practice makes perfect, as they say in Warhammer! Experiment with different tactics, unit combinations, and learn from your mistakes. The more you play, the more proficient you will get at using the Tower of Zharr like a Chaos master.
What is Hellcard in the Tower of Zharr?
Hellcard allows up to three heroes to fight against the Archdemon’s horde in co-op fights. In single-player mode, you can explore the dungeons alone or operated by computer friends. In multiplayer mode, you can enlist the support of friends or strangers to face the monsters of hell.

The Tower of Zharr is a fearsome and powerful asset in the Warhammer universe, belonging to the malevolent Chaos Dwarfs. This towering fortress is a seat of dark power and a devastating weapon of destruction on the battlefield. To wield it effectively, players must consider strategic placement, target priority, and protection to unleash their full potential against enemy forces. The Tower of Zharr is a formidable addition to the armoury of any Warhammer gamer.
Its commanding presence and destructive firepower make it a fighting force to be reckoned with. Players can inflict considerable damage on opponent troops and disrupt their strategies by properly positioning the tower and targeting the most critical threats.
The Tower of Zharr, on the other hand, is not without flaws. Because of its lack of mobility and vulnerability to counterattacks, it requires careful planning and help from other units to remain safe. Players must also be aware of obstructions hindering their shots and adjust their positioning accordingly.
Practise, experimentation, and a strong awareness of the Tower of Zharr’s strengths and weaknesses are required to become a master of it. Players will unleash the entire potential of this terrifying fortress as they refine their tactics and timing, overwhelming opponents and changing the tide of combat in their favour.
